I consider JDeveloper as a great data base design tool for some reasons:
- It can navigates through the Oracle databases
- It has a very good ER editor.
- It can change the data base schema when you modify the diagram
We can download from Oracle’s web the last JDeveloper version for our operating system. Installing is very easy, you just must have installed the JDK.
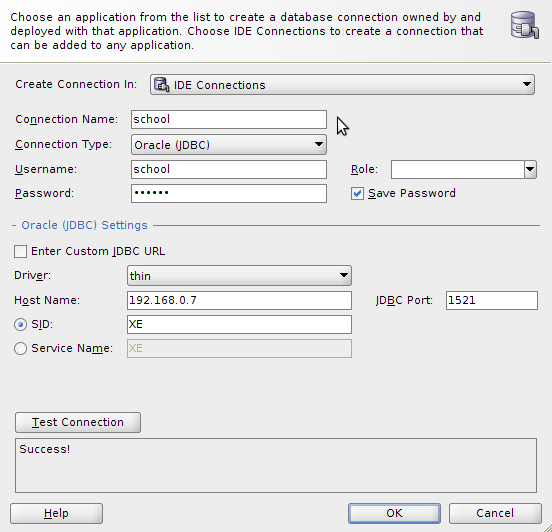
To connect the database which we create in a early post select the upwards menu View > Database > Database Navigator. And over “IDE connections” click with right button selecting “New connection”. You must configure the connection as shows the figure:
Now we will create an application called “School”, click in “New Application”, where you want, with the template “Generic Application”. I will call the project “CertificatesEmitter”.
The Diagram
With right button over the project we create the diagram: New… > Database Tier > Database Objects > Database Diagram. I call it “SchoolDB”. It creates the file SchoolDB.db_diagram as shows the following figure.
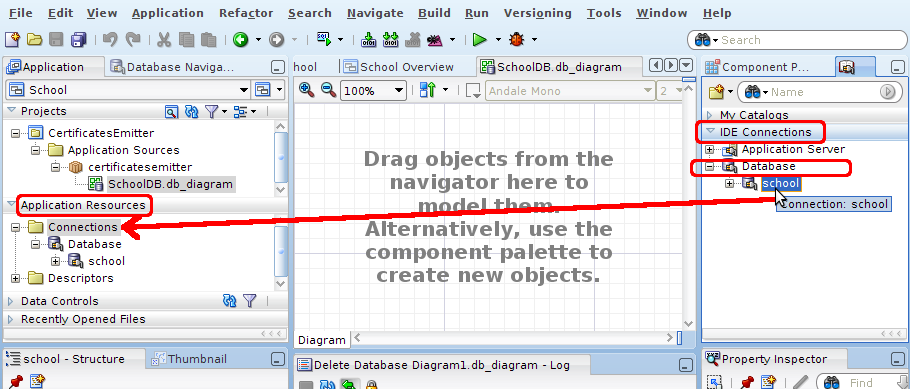
Before we create the connection to our data base in the IDE, but now we must carry it to the application. We can do this dragging an drop, as we can see in the figure, from the “IDE Connections” window to “Application Resources”:
In the middle we can see a grid, this is the zone where we will edit our data model. In right hand we have the Component Palette, and we will construct tables, sequences,… with wizards:

When yo create a table, if you want the changes persist in your data model, you must to specify the location, which will be the “school” connection imported before.
Editing the data base
In the figure we show you the navigator window which JDeveloper holds:
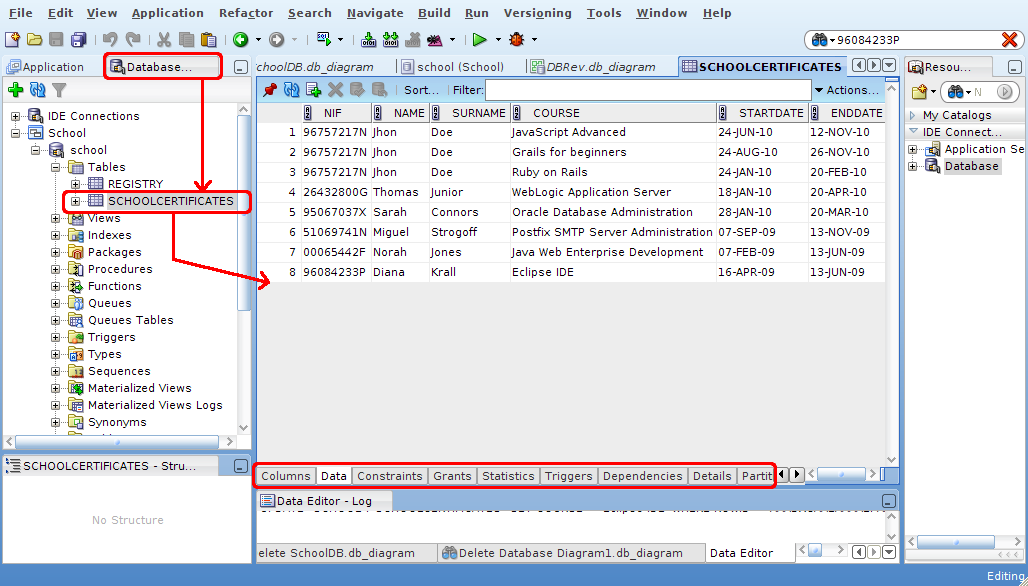
We can editing every object clicking over it. And through the foot tabs we can edit data, fields, triggers,….
To create the export script just click with right button over the object and select > Export Data > insert…
Reverse Egineering
In the same application we are going to create the RevEngProject project. With right button: New… > Database tier > Copy Database Objects to a Project. With School connection we create OfflineDB SchoolDBRev, and import the last created objects. We select to generate the DDL CREATE sentences.
Then we have the reverse engineering objects that we can drag and drop to a new diagram to see the ER model.
Generate DDL script
At this point we can generate the data base structure script from the connection and from the reverse engineering imported objects. Over the DB offline folder, with the right button: New … > Database tier > Offline Database Objects > SQL generated from Database Objects.
Here I put the generated files in this post: